
While viewing content, the transcript scrolls in tandem with the recording as it plays, syncing up video content with closed captioning. The text auto-scrolls, highlighting the search terms in blue where they appear. Auto-scrolling will disable scroll up or down within the transcript. You can resume auto scrolling at any time by clicking the Resume Auto-Scroll button near the bottom of the transcript pane. You can click on any word and SnapStream will take you to that moment in the recording. You can also use the Search box at the top of the transcript pane to moments where the keyword was mentioned in the recording.
You can access the transcript via the Library by locating your Library item and clicking the CC button. This method is utilized when you want to download, edit, or clip from the transcript; here’s an illustration of how that appears:
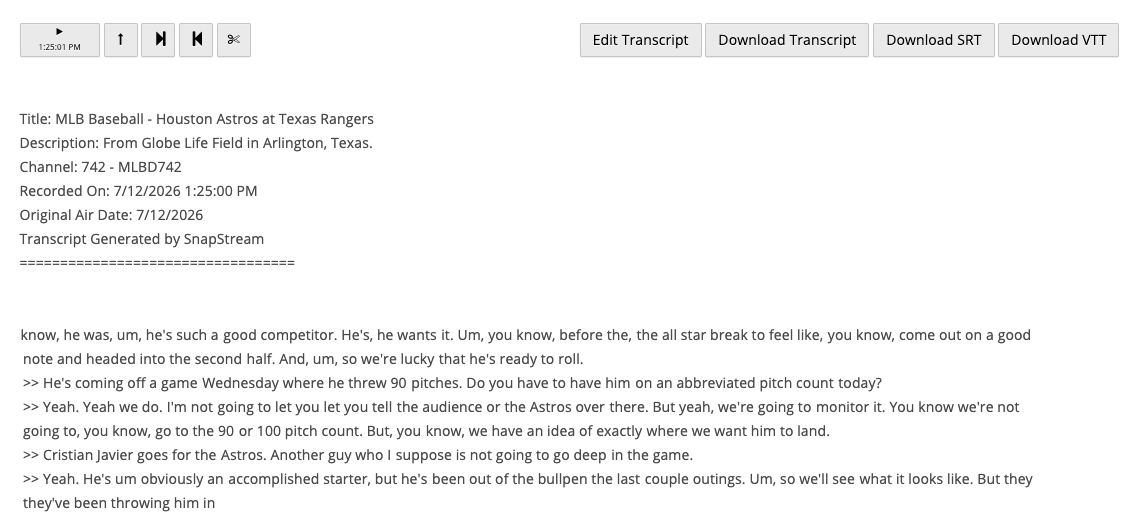
The transcript can be downloaded, edited, and you have the option to clip segments from it. You can obtain transcripts in .TXT, .SRT, or .VTT formats. The editing feature for the transcript enables you to correct misspellings and mistakes in the closed captions. The Clip From Transcript feature permits you to choose a block of text from the transcript to create a video clip that highlights that content.
Downloading transcripts as .TXT, .SRT, or .VTT files.:
- To obtain the transcript in any of the available file formats, just locate the library item and click the CC button adjacent to it.
- After navigating to the transcript page, check the top right corner for buttons marked: Download Transcript (.txt file), Download SRT (.srt file), & Download VTT (.vtt file.)
- Select your preferred file type, and your browser should initiate the transcript download. If it does not, try holding control/command while clicking.
 Searching transcripts:
You can use SnapStream Search to search through your transcripts. There are custom operators that aid in filtering the results, you can find more information about that here :
Editing Transcripts:
- To modify a transcript, locate the library item and click the CC button adjacent to it.
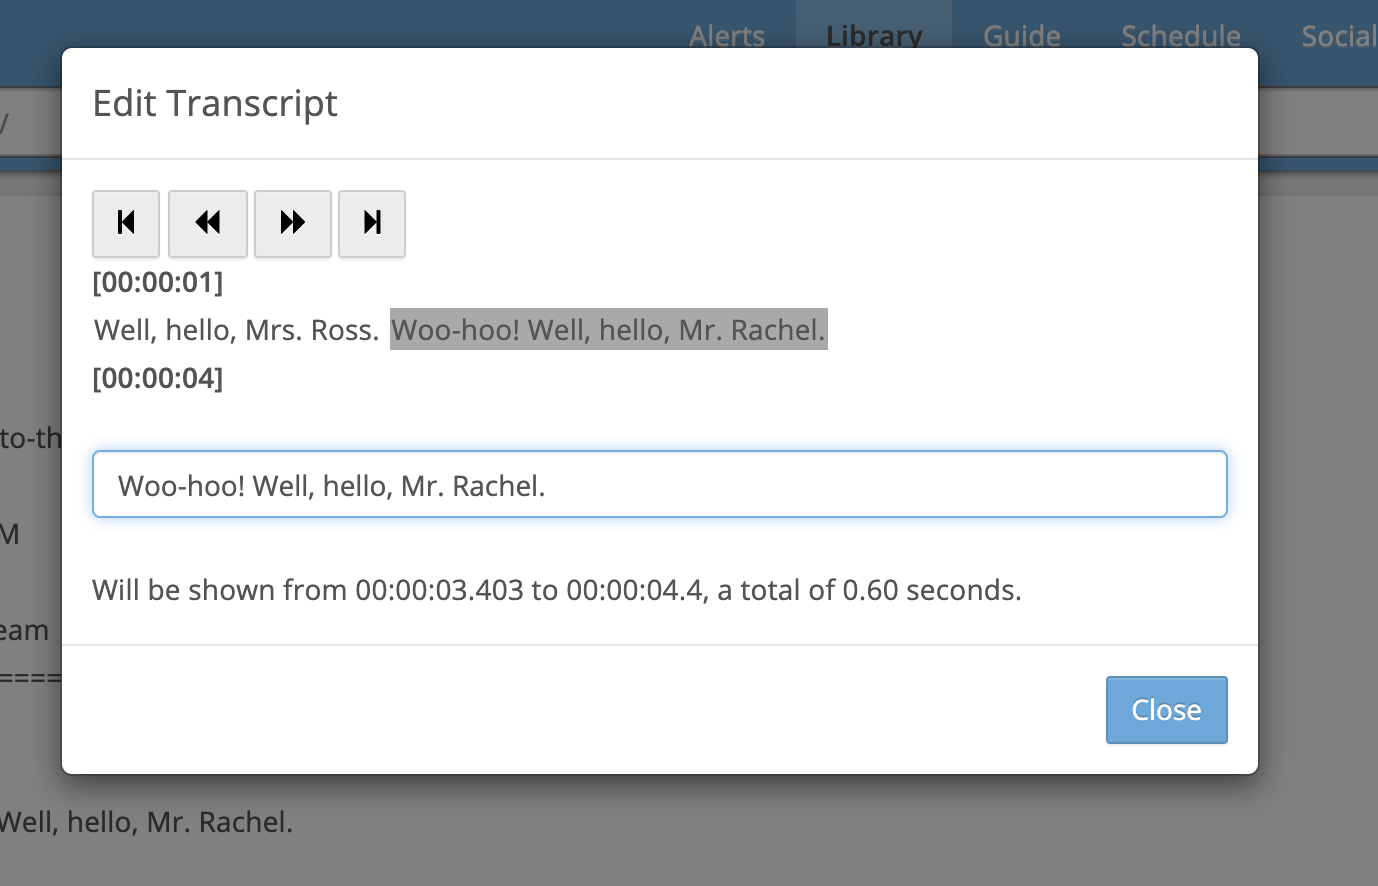
- Once the transcript page opens, look for the "Edit Transcript" button in the upper right corner.
- Choose a section you wish to edit, and a dialog should pop up.
- Implement the necessary changes, then click "Close."
Clip From Transcript:
Generating a clip from a transcript is a fascinating feature that enables you to create clips from recordings with accompanying transcripts. Previously, we discovered this feature to be particularly helpful for individuals who are traveling or experiencing poor bandwidth but still need to produce and share clips. Since the clipping is based on the transcript, it may not always be the most precise approach; however, if you find it necessary, you could extend the clip markers, create the clip, and refine it later. Your experience may vary.
To create a clip from a transcript:
- Locate the library item (recording or clip) you wish to clip from.
- Press the CC button next to the library item to view the transcript.
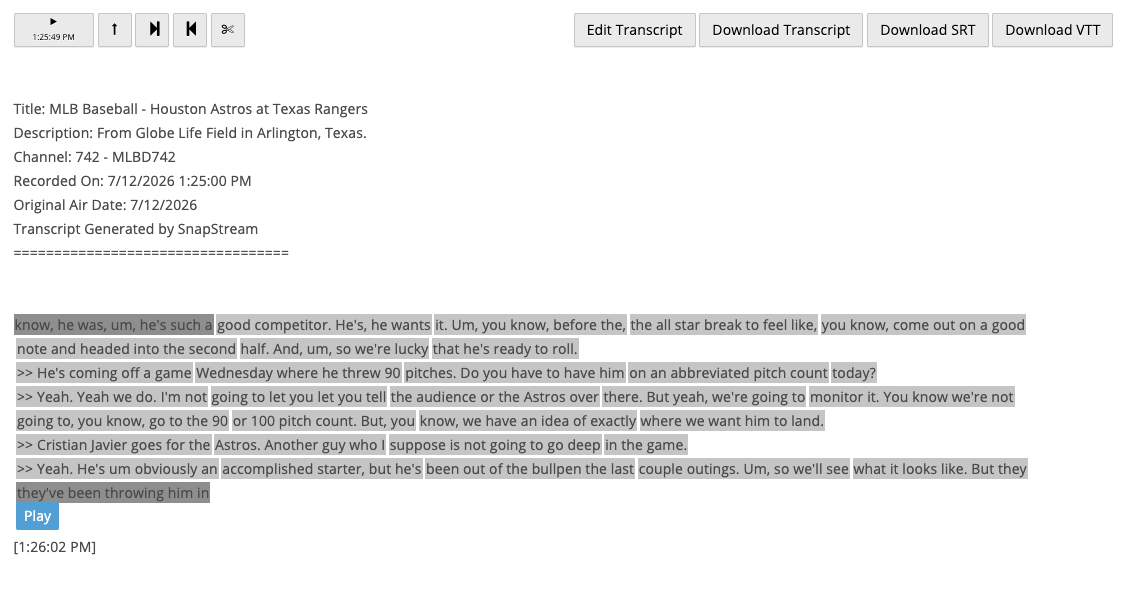
- To choose a starting point, navigate to the transcript and hover over a phrase until it appears gray. Click on it to activate the selection, then press "Z" or choose the clip start button from the panel.
- To designate an endpoint, hover over a phrase later in the transcript until it turns gray, click on it to activate, then press "X" or select the clip end button from the panel. This action will highlight the entire selection between the specified points.
- To create the clip, simply hit "C" or click the scissors icon at the top of the page.
Follow the prompts for clipping, and you will find the clip in the library under All Clips or My Clips.
Workflow to generate and export a transcript:
We can develop a workflow to automate the creation and export of a text version (.txt) of the transcript. If you are interested in implementing this, you will need to identify a trigger and a destination for the export. As with all workflows, we suggest contacting us for assistance with the setup.